The tools you use to do your work will affect the work you have to do and will often add to the work you have to do. (Yes, it’s a poor craftsman who blames his tools. It’s a ignorant craftsman who doesn’t choose his tools wisely. It’s a stupid craftsman who doesn’t take care of his tools.) A simple form of that is a screwdriver. A flat screwdriver does different things than a phillips screwdriver does. In my case (modeling), I find myself sometimes using copper shim stock in place of styrene. It works differently (duh) and the stock itself often needs to be shaped, usually starting with being flattened.
To flatten the shim stock, I use a small ball pein hammer and a small anvil. The ball pein hammer I’m using I inherited. If you look at the face of it you can see where it was used…roughly:
Hitting a piece of softer metal, such as copper, with that will imprint the texture of the hammer onto (and into) the copper. And knowing that can be useful if you need to impart a texture to the surface you’re hammering…but it’s quite annoying if you don’t want a texture.
I used 220 grit sandpaper on a sanding disc to get the face of the hammer to look like this (and later on I intend on polishing it but right now it’s too cold in the garage where my buffing set up is):
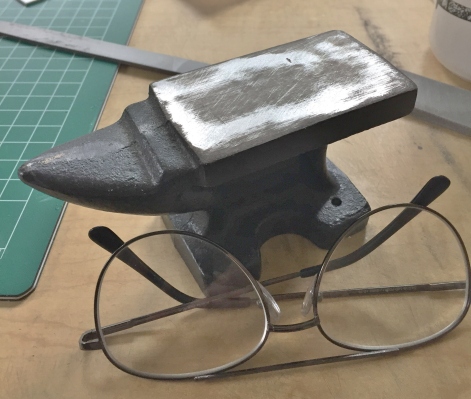
The other part of metal forming is that the metal used will need a surface against which to be shaped. Since I’m mostly interested in flattening the metal, having a flat anvil face is a good idea. The anvil I purchased was not finished by a metal finisher! It was sandcast and the surface roughly smoothed with a belt or disc sander…using a coarse grit. So I started filing the face of it flat using a coarse mill bastard file and moved to a fine mill bastard file, finishing with 220 grit on a sanding disc. As you can see below, the top of the anvil wasn’t remotely “flat,” and the curve of the horn (the pointy part) still had texture from the casting sand. All that had to go:
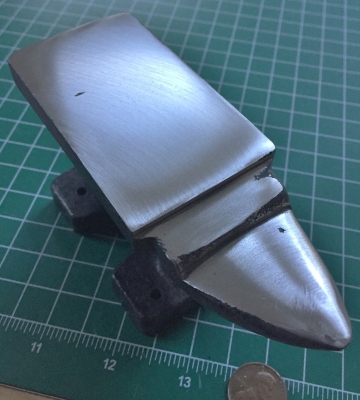
And after a few hours work, gone it is (and will be polished when the hammer gets polished) (I hate polishing…dirty work, that.):
Now when I use this hammer and anvil, there’s no undesired and unwanted texture added. Don’t be afraid to modify your tools to suit your needs and purposes! If you screw one up, it can always be replaced. You own your tools, they don’t own you.


Thanks for the glasses for the sense of scale. I was thinking of the typical hundredweight anvil. That wasn’t nearly as big a job as I thought it was.
So, are you going to polish it on sandpaper glued to a glass plate? Or is that excessively Type A anal for this application?
LikeLike
If it was a softer alloy the glass plate method would be more understandable. Since it’s probably iron, three successively finer grades of polishing compound with a sisal buffing wheel will do it…same for the hammers.
LikeLike
I was thinking the plate would help you get a planar surface, which would be hard with a wheel.
LikeLike
I understand about the glass. I used to work in art-casting foundrys and frequently had to put a flat, mirror polish on metals much softer than iron, so I have developed the technique for using a wheel on a surface I need to keep flat.
LikeLike